Plasma cutting is quite a simple process and once you have used a plasma cutter we can almost guarantee you that you will never want to go back to oxy-fuel cutting, grinding discs, cutting discs or anything else for that matter!
Plasma Cutters are a great tool and one that we feel should be a mainstay in any environment where metal cutting regularly takes place, additionally they are easy to use and also represent a cheaper alternative to oxy-fuel cutting.
In our short plasma cutting guide, we list the 13 steps that you should take when working with plasma cutters.
- Find a suitable location – Choose your work location. You will need to find an area that is safe to work in and one that provides freedom of movement as you plan on cutting metal.
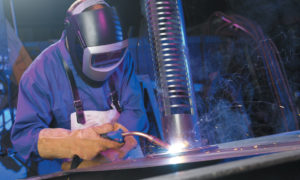
- Ensure you have all safety equipment – appropriate welding helmet or goggles with the right shade. Make sure your arms and legs are all covered with a welding jacket, welding gloves, flame retardant trousers and appropriate footwear.
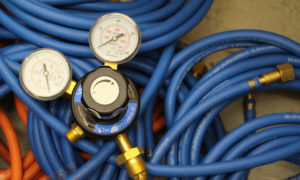
- Connect the air compressor – and adjust the air supply to suit the machine (refer to manual). In case your plasma cutter does not have an inbuilt air compressor then you need to source and connect to an external air compressor. Connect the compressor to the plasma cutter.
(See the full range of Air Compressors available at Engweld.)
- Plug in the plasma cutter – Plug in your plasma cutter and be sure the machine is turned off for now. Refer to your plasma cutting machine to see what power supply it needs.
- Attach the earth lead – or ground clamp to your work piece to ensure a good return path for the current from the plasma torch to the plasma cutter. Make sure to place it close to where you will be cutting.
- Connect the plasma cutting torch – to your plasma cutting machine.
- Turn on the plasma cutting machine – just flip the switch on the plasma cutting machine to the ‘On’ position. Now adjust the air to required air flow and pressure (refer to manual).
- Set the current – on the plasma cutting machine, select the amperage. This will vary depending on the type of metal you are cutting, thicker materials will require higher amps.
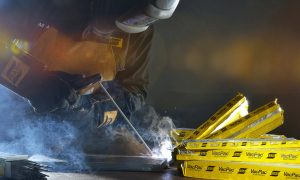
- Get cutting! – by pressing the trigger on the plasma torch handle to activate the plasma cutter. There may be a safety button on the torch that needs to be pressed first. Move the plasma torch across your work piece as the plasma arc does the cutting.
Note: Once you have stopped cutting, you may notice the air will continue to flow from the torch for a certain amount of time. This is for cooling the components of the torch.
- Turn off the plasma cutting machine – when you have done the cutting, the first thing to do is turn off the plasma cutting machine and unplug from the mains.
- Disconnect the earth lead – or ground clamps from your work piece.
- Turn off the air/gas – if you used an external air compressor.
- Wrap the hoses – by wrapping the plasma gun line, airline and ground line you can keep the hoses in better condition.
If you need any help with your plasma cutter or have any queries, please contact us and speak to one of our experts.